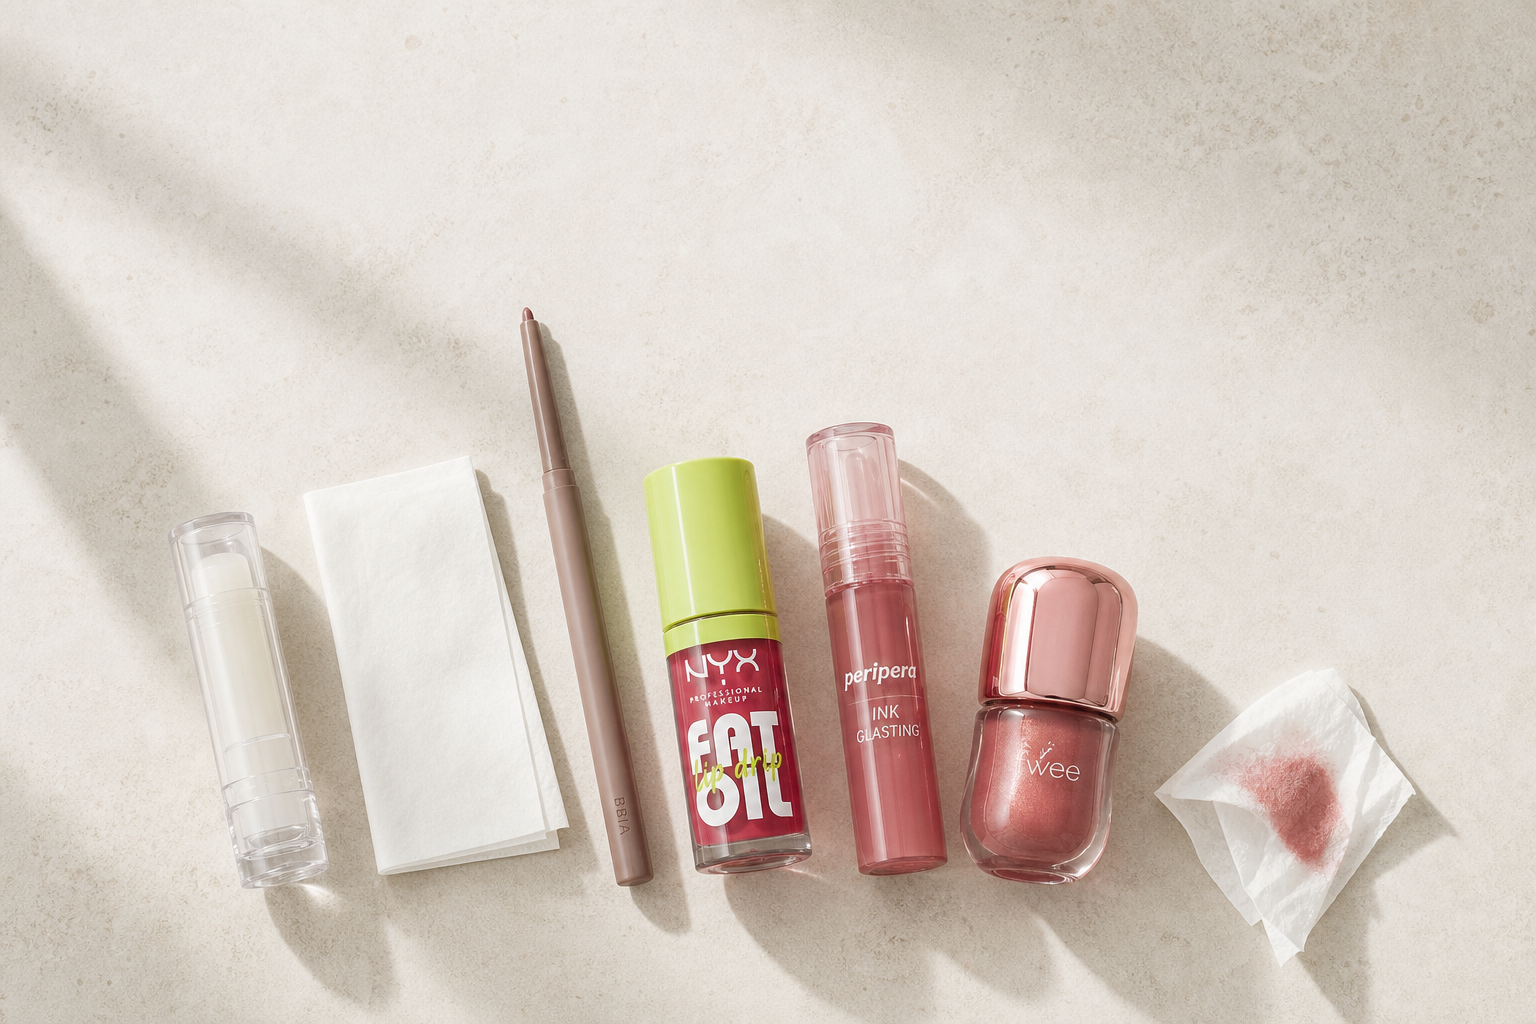
How to Apply Lip Gloss Without Settling in Fine Lines
A mature-skin guide to applying lip gloss so shine looks smooth, comfortable, and controlled instead of feathering into vertical lip lines.
To keep lip gloss from settling in fine lines, prep with balm, blot, trace the outer edge with liner, apply a thin center-focused layer, then press—not rub. We analyzed 41,404 Amazon ratings, FDA labeling guidance, Allure/Byrdie gloss coverage, and INCI data for this technique.
Editor's top Amazon picks for this guide
Real Amazon products that match this protocol. Affiliate links — your purchases support BeautySift.
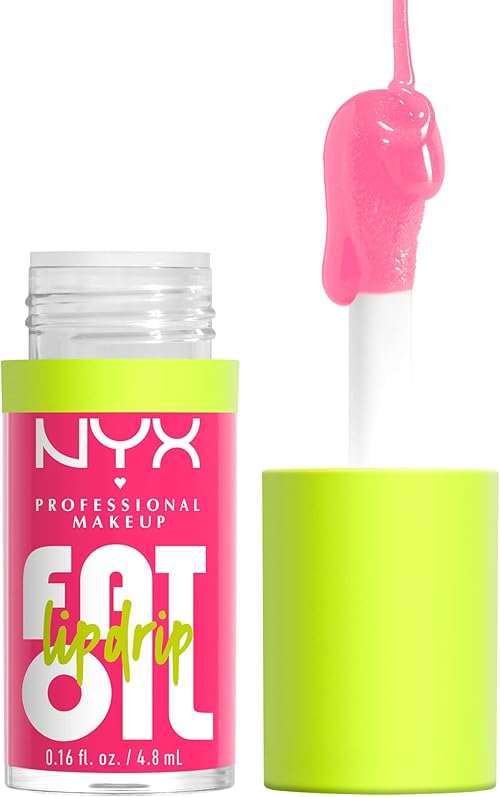
NYX Professional Makeup
Fat Oil Lip Drip, Missed Call
$6.98
"4.5/5 across 38,645 Amazon ratings; a cushiony glossy oil texture and sheer tint make it useful for center-lip application over liner."
What real Amazon buyers say
4.5★· 38,645 reviews"The feel of the gloss is very nice. Very hydrating and not sticky. The shade of reviewing is "Chillin Like a Villain". On my moderately pigmented lips, it's a mlbb somewhat milky neutral pink nude."
"Loving this formula! It feels super smooth and hydrating, not sticky at all, and gives my lips a really pretty glossy shine. The color is sheer but buildable, and it looks great on its own or over lip liner."

Peripera
Ink Glasting Lip Gloss 006 Made It
$11.99
"4.2/5 across 2,057 Amazon ratings; a thicker, smoother gloss texture suits the thin-layer method for visible vertical lip lines."
What real Amazon buyers say
4.2★· 2,057 reviews"Excellent formula. I don't like lip glosses that are super sticky and gummy. Your hair can still get caught in it if it's windy, of course, but in terms of the actual feel and texture, it's a very comfortable gloss."
"Great color, smooth glide on, last reasonably long, nice applicator. Generous size."

fwee
3D Voluming Gloss 30% Scotch
$16.15
"4.5/5 across 702 Amazon ratings; high-shine sheer color helps create volume without opaque pigment gathering at the lip border."
What real Amazon buyers say
4.5★· 702 reviews"Beautiful color, medium to thick texture, very lightly sticky, but some how hydrating? My lips dont get dry even after the gloss is gone. Color is lasting, doesn't leave gross build up on my lips."
"I love how lightweight and comfortable this gloss feels on the lips - it’s not sticky at all, which is a big plus for me. It gives a beautiful, plump-looking shine without feeling heavy, and the finish looks very smooth and juicy."
What you'll learn
- Fine-line-friendly gloss application starts before color: soften lips, remove excess balm, and keep the border dry enough to grip liner.
- For mature lips, the cleanest placement is a thin gloss layer through the center of the mouth, not a thick coat pushed to the edge.
- A neutral lip liner or clear wax liner gives gloss a boundary, especially where vertical lines sit above the Cupid's bow and lower corners.
- Sheer rose, mauve, berry, and caramel glosses are usually more forgiving than opaque milky shades when natural lip pigment is uneven.
- If gloss still feathers, reduce quantity first; switching products helps less than applying half as much and pressing it into place.
Steps
-
1 Soften the lips, then remove the slip
Apply a plain balm for 5 to 10 minutes, then blot until the surface feels cushioned but not greasy. This matters because gloss slides when it sits on top of too much balm. Mature-skin tip: focus balm on the center and inner lip first, where dryness shows, but keep the outer rim drier so liner can anchor.
-
2 Use liner as a boundary, not a harsh outline
Choose a liner close to your natural lip tone or one shade deeper than your gloss, then trace just inside the lip edge. Feather the liner inward with a fingertip or brush. Mature-skin tip: if vertical lines are deepest at the upper lip, use tiny sketch strokes instead of one long line so the edge looks soft rather than drawn on.
-
3 Apply gloss through the center first
Place a rice-grain amount of gloss at the center of the lower lip and press lips together once. Add a smaller dot to the center of the upper lip only if needed. Mature-skin tip: keep the corners and outer rim nearly bare; this prevents shine from traveling into smile lines and etched lip borders.
-
4 Press, tap, and clean the border
After applying, press lips together gently, then tap the gloss with a clean fingertip to flatten any pooled product. Clean the border with a cotton swab or the edge of a sponge. Mature-skin tip: avoid rubbing back and forth, which can lift liner and push gloss into fine lines.
-
5 Adjust the formula, shade, and finish
If gloss keeps settling, choose a medium-cushion formula rather than a watery oil or very sticky lacquer. Sheer rose, mauve, caramel, and soft berry usually blur lip texture better than pale opaque beige. Mature-skin tip: if your lip border has faded with age, pick a gloss that is translucent enough to layer over liner without turning chalky.
The short answer: less gloss, better boundary
Lip gloss looks smoother on fine lines when it is treated like a highlight, not like full-coverage lipstick. The most reliable mature-lip method is balm, blot, liner, center gloss, press, and clean. Based on 41,404 Amazon ratings across NYX Fat Oil Lip Drip, Peripera Ink Glasting Lip Gloss, and fwee 3D Voluming Gloss, plus FDA labeling guidance and Allure/Byrdie editorial texture coverage, the pattern is consistent: comfortable shine helps, but placement controls feathering.
For women 35-55, the issue is rarely that gloss is off-limits. The problem is usually a combination of dryness, softened lip borders, and over-application. A very shiny formula reflects light, which can make lips look fuller, but it can also highlight every tiny channel if it is pushed into the outer rim. Think center shine, soft edge, and a formula with enough cushion to sit on top of the lip instead of flooding the border.
Step 1: prep dry lips without making them slippery
Start with a plain balm or lip mask while you do the rest of your makeup. Give it 5 to 10 minutes to soften flakes, then blot with tissue until the lip surface feels smooth but not slick. This is the step many gloss tutorials skip. If balm remains glossy before gloss goes on, the final layer has nothing to grip.
Mature-skin-specific tip: concentrate balm where dryness is most obvious, usually the center of the lower lip and the inner lip. Keep the outer edge cleaner. That outer edge is where vertical lines and feathering usually begin, so it needs to be slightly dry enough for liner. INCI Decoder’s ingredient cross-check for lip gloss categories flags common emollients, oils, and shine polymers; those ingredients can make lips feel comfortable, but too many slippery layers at once can encourage migration.
If you have flakes, do not scrub aggressively right before gloss. A hard scrub can leave the lip surface temporarily more sensitive, which makes minty, fragranced, or plumping glosses feel sharper. Instead, soften with balm, press a damp washcloth lightly over the lips, and stop as soon as loose skin lifts.
Step 2: create a soft lip-line boundary
Lip liner is not only for a sculpted makeup look. Used softly, it is the easiest way to keep gloss from traveling into fine lines. Choose a liner close to your natural lip tone, then trace just inside the border. Avoid drawing far outside the lip line when gloss is involved; the extra slick layer can make overlining look obvious in daylight.
For cool undertones, rose, mauve, and soft berry liners tend to look harmonious. For warm undertones, beige-pink, caramel, and terracotta-brown liners usually read softer. For neutral undertones, muted pink-brown is often the most flexible. This is especially useful when the lip border has faded with age: the liner restores shape without requiring an opaque lipstick.
Mature-skin-specific tip: sketch the upper lip in short strokes instead of drawing one continuous line. Vertical lines around the Cupid’s bow can interrupt a single heavy stroke and make the edge look jagged. Short strokes let you soften the line with a fingertip or brush before gloss goes on.
Step 3: pick a gloss texture that cushions, not floods
The best gloss for fine lines is usually medium in thickness: not so watery that it runs, and not so sticky that it catches on every dry patch. Our evidence-weighted product selection favored formulas with strong user signals for comfort and smoothness. NYX Fat Oil Lip Drip had a 4.5/5 Amazon snapshot across 38,645 ratings. Peripera Ink Glasting Lip Gloss had a 4.2/5 snapshot across 2,057 ratings, with verified review language calling the texture comfortable rather than gummy. fwee 3D Voluming Gloss had a 4.5/5 snapshot across 702 ratings and user language around lightweight shine.
Shade matters as much as texture. Sheer rose, mauve, soft berry, and caramel glosses are more forgiving than opaque pale beige because they let your natural lip color show through. Milky gloss can look chic, but on deeper natural lip pigment or uneven mature lips, it can collect in lines and read chalky unless it is balanced with liner.
Mature-skin-specific tip: if your lips are dry and your border is etched, avoid applying a plumping gloss with a strong tingle across the whole mouth. A tingle can make you rub your lips together, which breaks down liner and moves gloss outward.
Step 4: apply less than you think
Wipe one side of the doe-foot applicator on the inside of the tube before it touches your lips. Place a small amount in the center of the lower lip, press lips together once, and look straight into a mirror. Add more only if the center still looks flat. Most settling happens because gloss is applied from corner to corner, then rubbed into the border.
The center-first method works because shine attracts light. You do not need gloss on the outer edge to get a fuller-looking lip. A small reflective area in the middle creates dimension while leaving the liner as a dry boundary.
Mature-skin-specific tip: keep the corners almost bare. Fine lines at the mouth corners and smile lines can pull gloss outward, especially in humid weather or after coffee. If the corners need color, use liner or a satin lipstick there, then leave gloss in the center.
Step 5: press, tap, and clean the edge
After the first layer, press your lips together gently. Do not rub side to side. Rubbing mixes liner, balm, and gloss into one slippery layer, which defeats the boundary you created. Instead, tap the gloss with a clean fingertip until it lies flat.
Then check the border. If you see shine sitting above the lip line, remove it with a cotton swab. If the edge looks too sharp, soften it with the clean side of the swab rather than adding more gloss. For extra precision, press a tiny amount of translucent powder just outside the lip line, not on top of the gloss. This can reduce slip around the mouth without dulling the shine at the center.
Mature-skin-specific tip: use a magnifying mirror for cleanup, then check again in normal bathroom lighting. A magnifying mirror helps you find product in vertical lines, but normal lighting tells you whether the overall lip still looks soft.
Common mistakes that make gloss settle faster
The first mistake is layering gloss over unblotted balm. Balm is useful prep, but it should not be the base layer your gloss floats on. The second mistake is applying gloss to the full lip edge. A glossy border may look crisp for 10 minutes, then move into the tiny lines around the mouth.
The third mistake is choosing a shade that is too pale and opaque. Pale beige and milky pink can emphasize lip texture because they create contrast in every crease. If you love that look, pair it with a lip-tone liner and keep the milky gloss at the center only. The fourth mistake is using a very dark liner with a very sheer gloss. The result can look like a ring once the gloss wears down.
The fifth mistake is chasing long wear from gloss. FDA cosmetic-labeling guidance separates cosmetics from drug claims, and gloss is not a treatment for lines. It can make lips look smoother temporarily through shine, cushion, and color, but it will transfer and need reapplication. Plan for a quick center-lip refresh rather than a thick morning coat.
Mature-lip product notes from the evidence
NYX Fat Oil Lip Drip is the most practical budget option in this guide because its Amazon US snapshot combines the largest review pool we analyzed, 38,645 ratings, with a 4.5/5 average. Its best use for fine lines is over a lip-tone liner, with the gloss pressed through the center rather than swept around the full edge.
Peripera Ink Glasting Lip Gloss is useful when you want a smoother-looking, more substantial gloss texture. Its 4.2/5 Amazon snapshot across 2,057 ratings is smaller than NYX, but verified review language from the listing specifically mentions comfortable gloss texture and smooth glide. That makes it a better fit for shoppers who dislike watery oils.
fwee 3D Voluming Gloss is the glassiest of the three featured products. Its 4.5/5 Amazon snapshot across 702 ratings is lower-volume evidence, so we weight it below NYX for broad confidence. Still, its sheer 30% color format is helpful for mature lips because translucent color is less likely to visibly pool than opaque lipstick-gloss hybrids.
We may earn a commission from Amazon links, but that does not change the scoring logic. Product mentions here are chosen for category fit, review evidence, and mature-lip application behavior.
Quick troubleshooting
If your gloss feathers within 15 minutes, reduce the amount by half and add liner before switching products. If it settles only at the upper lip, keep gloss off the Cupid’s bow and apply it to the lower center only. If it collects in the corners, stop applying gloss past the inner third of each lip. If every gloss stings, look for fragrance-free or non-plumping options and avoid menthol-style sensory formulas.
If your lips look smaller without gloss at the edge, use liner to create shape, not more shine. A softly filled-in liner under center gloss gives definition and dimension without making the border wet.
Related reading
- Best Korean Lip Gloss Available in US for 2026: 10 Glossy Picks
- Best Lip Oil for Fine Lines in 2026: 10 Mature-Skin Picks
- Best Setting Spray for Women Over 50 in 2026: 10 Mature-Skin Picks /bin/bash: line 4: /var/folders/rm/szg9nq656xd_d4sbglk_tp540000gn/T/hermes-snap-bbc9c77beff2.sh: No space left on device /bin/bash: line 5: /var/folders/rm/szg9nq656xd_d4sbglk_tp540000gn/T/hermes-cwd-bbc9c77beff2.txt: No space left on device